3 min to read
Event Timeline Component
Easy way to build an event timeline for your dashboards
Welcome
In the crazy new world of covid, I have now been put on furlough so I have a bit more time on my hands to produce some components. To be honest it is becoming harder to find a component I could see myself using, that I haven’t already built, or doesn’t already exit in universal dashboard. However I came across this event timeline component, and I though yep, I could see myself using this on a dashboard at least once, so as it didn’t exist on the marketplace or powershell gallery, I thought it would make a good addition.
Where Did You Find It?
As with pretty much all of the components I build I found this on npmjs.com the exact link to the project can be found by clicking on this link so as the example code didn’t look overly complicated, I thought I should be able to pull this off.
What Parameters Does It Have?
Well if you have a butchers at the original project on npmjs I have included each prop as a powershell parameter, and one additional parameter for the text you want displayed:-
  param(
        [Parameter()]
        [string]$Id = (New-Guid).ToString(),
        [Parameter()]
        [string]$Title,
        [Parameter()]
        [string]$Created,
        [Parameter()]
        [string]$Icon,
        [Parameter()]
        [string]$Text
    )
I think all these parameters are pretty self-explanitory, -title will give the title of the timeline entry, -Created just type in a date format, -Icon to specify a material icon, this is probably the most complicated parameter, for which I will explain later, but basically you can find all the icons you can use here. Finally the -Text parameter for the text you want in the timeline event.
Example Using The Component
So as this uses material icons, and to use material icons, you have to have the link in the <head> section of your HTML. Well this is where the founder of universaldashboard Mr Adam Driscoll comes to save the day, as he released UniversalDashboard Helmet module which can be found right here so to use the icons, you also need the Helmet module.
Import-Module -Name UniversalDashboard.Community -RequiredVersion 2.8.1
Import-Module -Name UniversalDashboard.Helmet
Import-Module "C:\ud\EventTimeline\EventTimeLine\src\output\UniversalDashboard.EventTimeline\UniversalDashboard.EventTimeline.psd1"
Get-UDDashboard | Stop-UDDashboard
Start-UDDashboard -Port 10005 -Dashboard (
    New-UDDashboard -Title "Powershell UniversalDashboard" -Content {
  	New-UDHelmet -Content {
                    New-UDHtmlTag -Tag 'link' -Attributes @{
                        rel  = "stylesheet"
                        href = 'https://fonts.googleapis.com/icon?family=Material+Icons'
                    }
                }
        New-UDRow -Columns {
            New-UDColumn -Size 5 -Content {
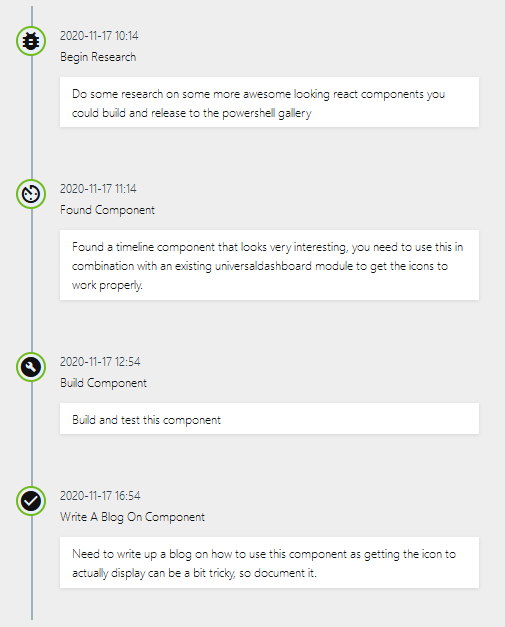
               New-EventTimeline -Title "Begin Research" -Created "2020-11-17 10:14" -Icon "bug_report" -Text "Do some research on some more awesome looking react components you could build and release to the powershell gallery"
                New-EventTimeline -Title "Found Component" -Created "2020-11-17 11:14" -Icon "av_timer" -Text "Found a timeline component that looks very interesting, you need to use this in combination with an existing universaldashboard module to get the icons to work properly."
                New-EventTimeline -Title "Build Component" -Created "2020-11-17 12:54" -Icon "build_circle" -Text "Build and test this component"
                New-EventTimeline -Title "Write A Blog On Component" -Created "2020-11-17 16:54" -Icon "check_circle" -Text "Need to write up a blog on how to use this component as getting the icon to actually display can be a bit tricky, so document it."
            }
        }
    }
)
Which Gives You This
Conclusion
Thanks for taking the time to read this blog. When I saw this component, I thought it would be good to use at presentations, for what would be covered. Or maybe use it to explain steps to your end-users. Or even for documenting things however you choose to use this component, I hope this blog has helped cover the steps on how to implement this component into your dashboard.

